Getting started
Connect your workstation to Panda
The following contains is based on FCI documentation with only few modifications to adopt to our installation.
Warning
Be sure that you are in super user mode to allow the use of real time scheduling
you can do this in the terminal with:
sudo su
Make sure that the Arm has been mounted on a stable base and cannot topple over, even when performing fast motions or abrupt stops.
Ensure that the cable connecting Arm and Control is firmly attached on both sides.
Connect the external activation device to Arm’s base and keep it next to you in order to be able to stop the robot at any time.
Important
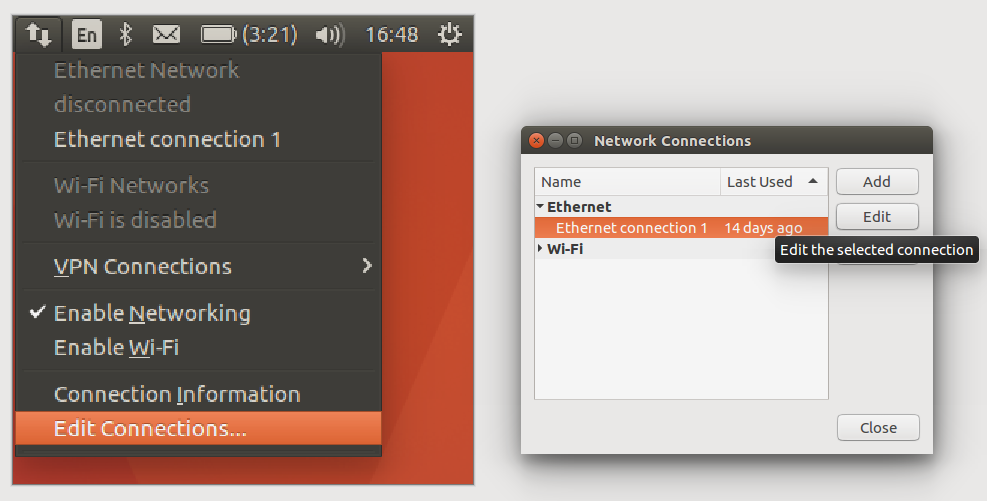
The workstation PC which commands your robot using the FCI must always be connected to the LAN port of Control (shop floor network) and not to the LAN port of the Arm (robot network). If first time you connect to Panda with Ethernet, choose automatic option for DNS adress.
Turn on your robot and wait until the light stabilises, make sure both emergency stops are pulled up as shown in the figure.

Verify that your Control’s address is (172.16.0.2).
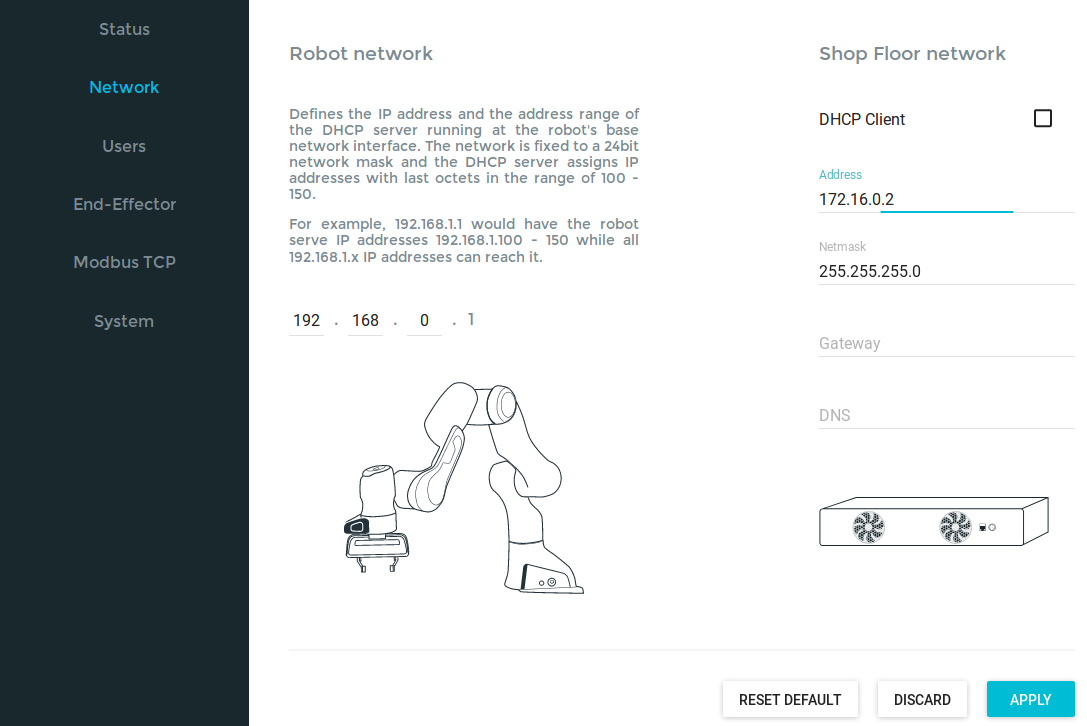
Workstation network configuration
After finishing these steps, we can open in chromo the address (http://172.16.0.2/) to access the robot desktop webpage.
Then unlock the robot’s joints.
Switch to super user mode if you have not already done so.
You can test if the connection is established by the following commands: .. code-block:: shell
ping 172.16.0.2 ./communication_test 172.16.0.2
You can launch a simple ros example by:
roslaunch franka_example_controllers joint_position_example_controller.launch robot_ip:=172.16.0.2 load_gripper:=true
Working with velocity_qp
A generic low-level joint velocity controller with a QP formulation developed by Lucas Joseph at INRIA Bordeaux, Auctus team.
 1. mkdir -p ~/auctus_ws/src
    cd ~/auctus_ws
    catkin config --init --extend ~/catkin_ws/devel --cmake-args -DCMAKE_BUILD_TYPE=Release -DFranka_DIR:PATH=~/libfranka/build -DCMAKE_CXX_FLAGS=-std=c++11

2. cd ~/auctus_ws/src
3. git clone https://gitlab.inria.fr/auctus/panda/velocity_qp.git
   wstool init
   wstool merge velocity_qp/velocity_qp.rosinstall
   wstool update
   cd ..
4. rosdep install --from-paths src --ignore-src -r -y --skip-keys="libfranka"
5. catkin_make
Delete qpOASES from auctus_ws/src repository, then, install the qpOASES from [mygithub](https://github.com/ZzhengP/robot_ws_zheng). modify also the CMakeList.txt in velocity_qp repository. change tip_link name in velocity_qp.yaml to panda_link8.
MPC wrap of velocity_qp
The source code and catkin workspace can be found on github repository. This package is called panda_mpc.
add panda_mpc_plugin to insert it in gazebo_control_plugin
add gazebo world plugin for simulation (replace the “sim” argument in run.launch by false when using the real robot )
Practical run time issus
Ensure that the robot configuration is not modified by other people
Guide mode can be selected via robot desktop. When using guide mode, push the white/black botton to lower position.
When you want to control the robot via your code, pull the botton, otherwise, you will see error as:
libfranka: Set Joint Impedance command rejected: command not possible in the current mode